Fitness videos can be broken down into a few simple steps that will help retain the interest of the viewer, and more importantly, ensure the viewers are seeing the moves and have a clear visual of how to follow the instructor. Here is an inside look into how we approach an on-location fitness shoot.
CAMERA PLACEMENT
We generally shoot fitness videos with two cameras. This allows the client to save energy when shooting multiple workouts in a day. If you decide to go the one camera route, which is totally fine, it will tire them out much faster. So keep that in mind. There is an argument to be made that one camera shoots look better in editing, but that is for another article.
Angle one or “main camera” is positioned at a neutral point for the scene. Pick a wide angle and keep the talent mainly in the middle.
The second angle has much more leeway. I like to set my second camera up on a moving stabilizer such as a Steadicam or slider. Keep it within the 180 degree line of the main camera so that cutting back and forth is smooth and not jarring to your viewers. If you wanted to add a third camera at a more extreme angle like from above or completely to the side you can, just remember when editing go to the neutral shot before breaking the 180 degree line.
SHOOTING FITNESS AND WORKOUTS OUTDOORS USING NATURAL LIGHTING
It can be tricky to control the light depending on the size of your set-up, the space you have access to or are allowed to set-up in.
I will use the two below videos as an example. The 1st video, with Holly and Balance Bar, was shot in a situation where we were unable to utilize a large set-up. A large setup would have caused too much attention and obtaining a permit to shut down a section of the beach was not in the client’s budget. So, in this situation we decided to forego using a silk diffusion and instead opted to fill the light in with a reflector in the foreground. We made sure to start with the morning light and be wrapping up before the sun was directly above her causing unflattering light and squinting.
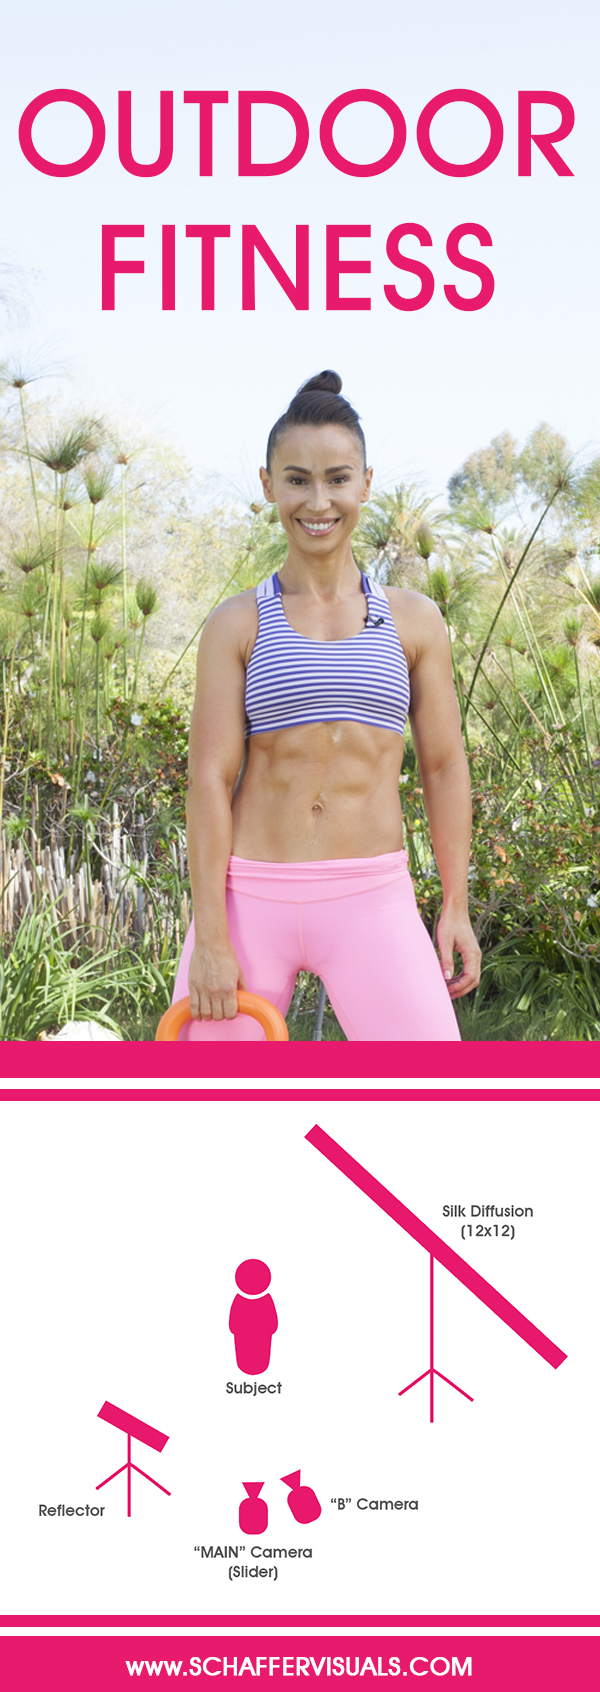
In this second example with Natalia, we implemented a 12×12 Manfrotto overhead silk diffusion. This allows you to shoot almost anytime during the daylight and control your light source (in this case, the sun). As with the Balance Bar example, we utilized reflectors in the foreground to fill in her face and create a beauty look.
Both ways give you the ability to achieve great lighting and exposure. Given the choice, I would pick the 12×12 silk over not using diffusion at all, but that is not the reality for every shoot.
TIP:
Using a 12×12 and the sun is starting to set? Bring a reflector flag to use instead of the silk. Place your subject with the sunset behind them and bounce the fill light with the 12x for a fantastic look.